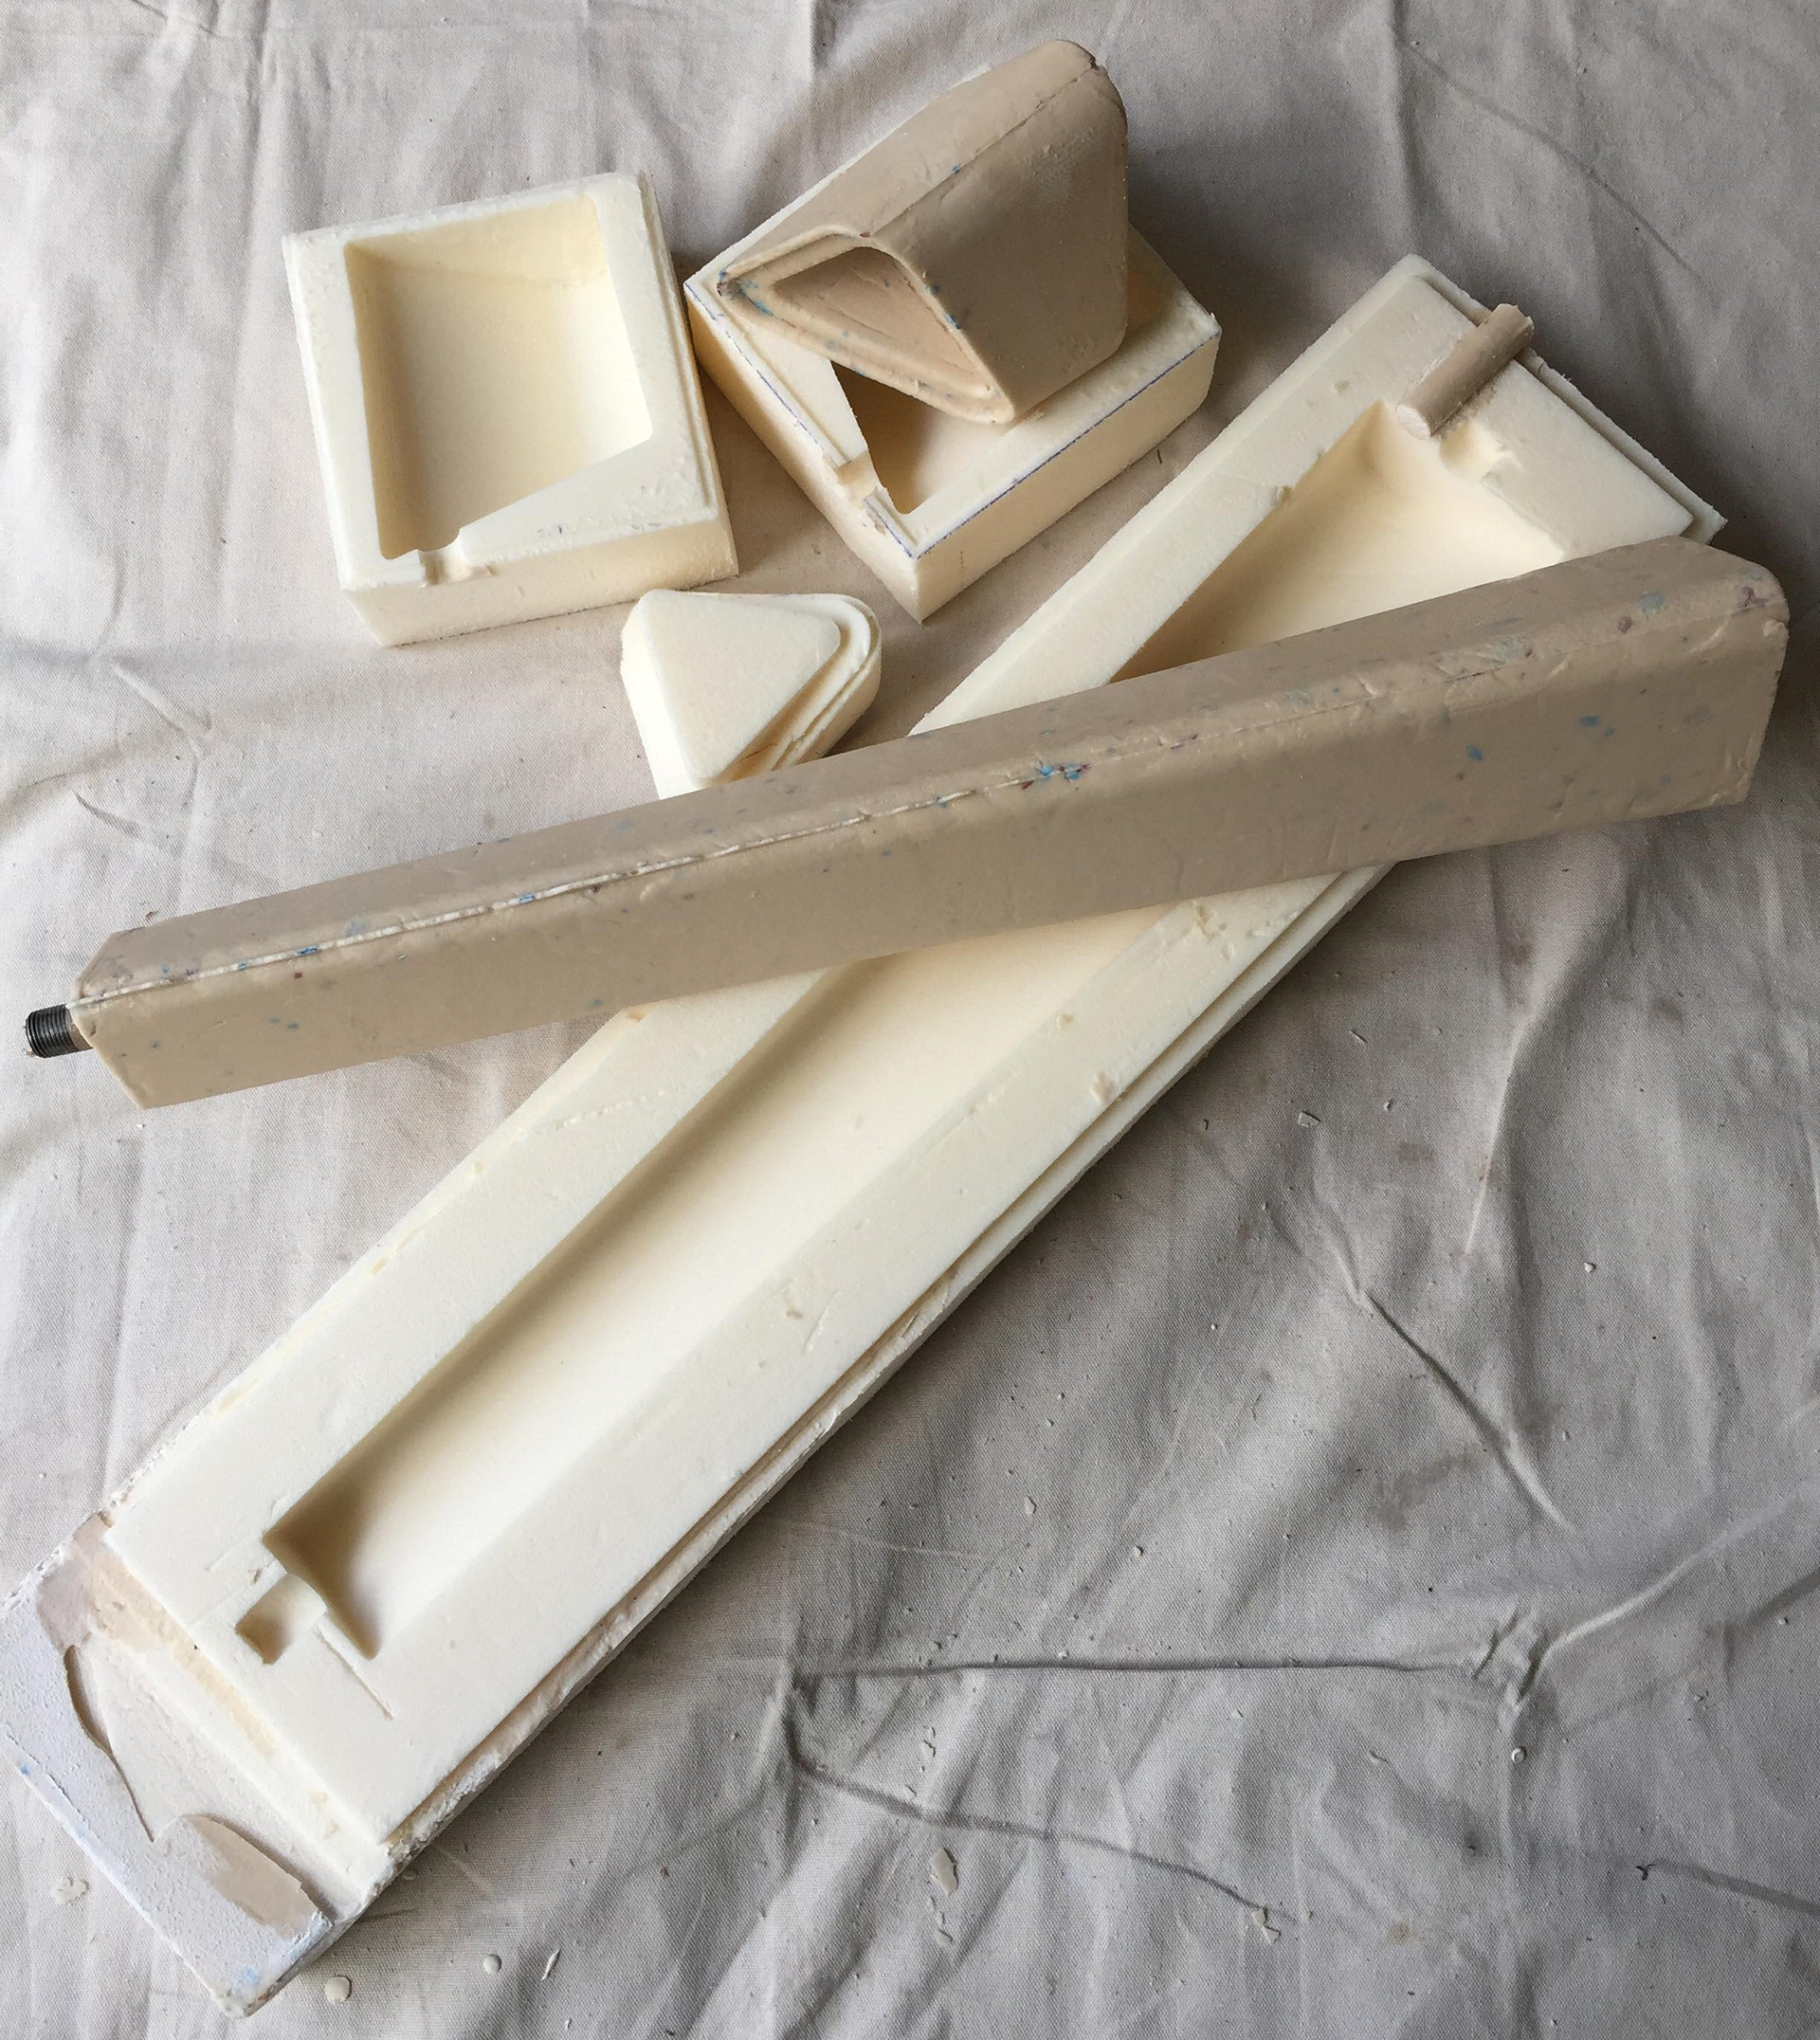
Foam models
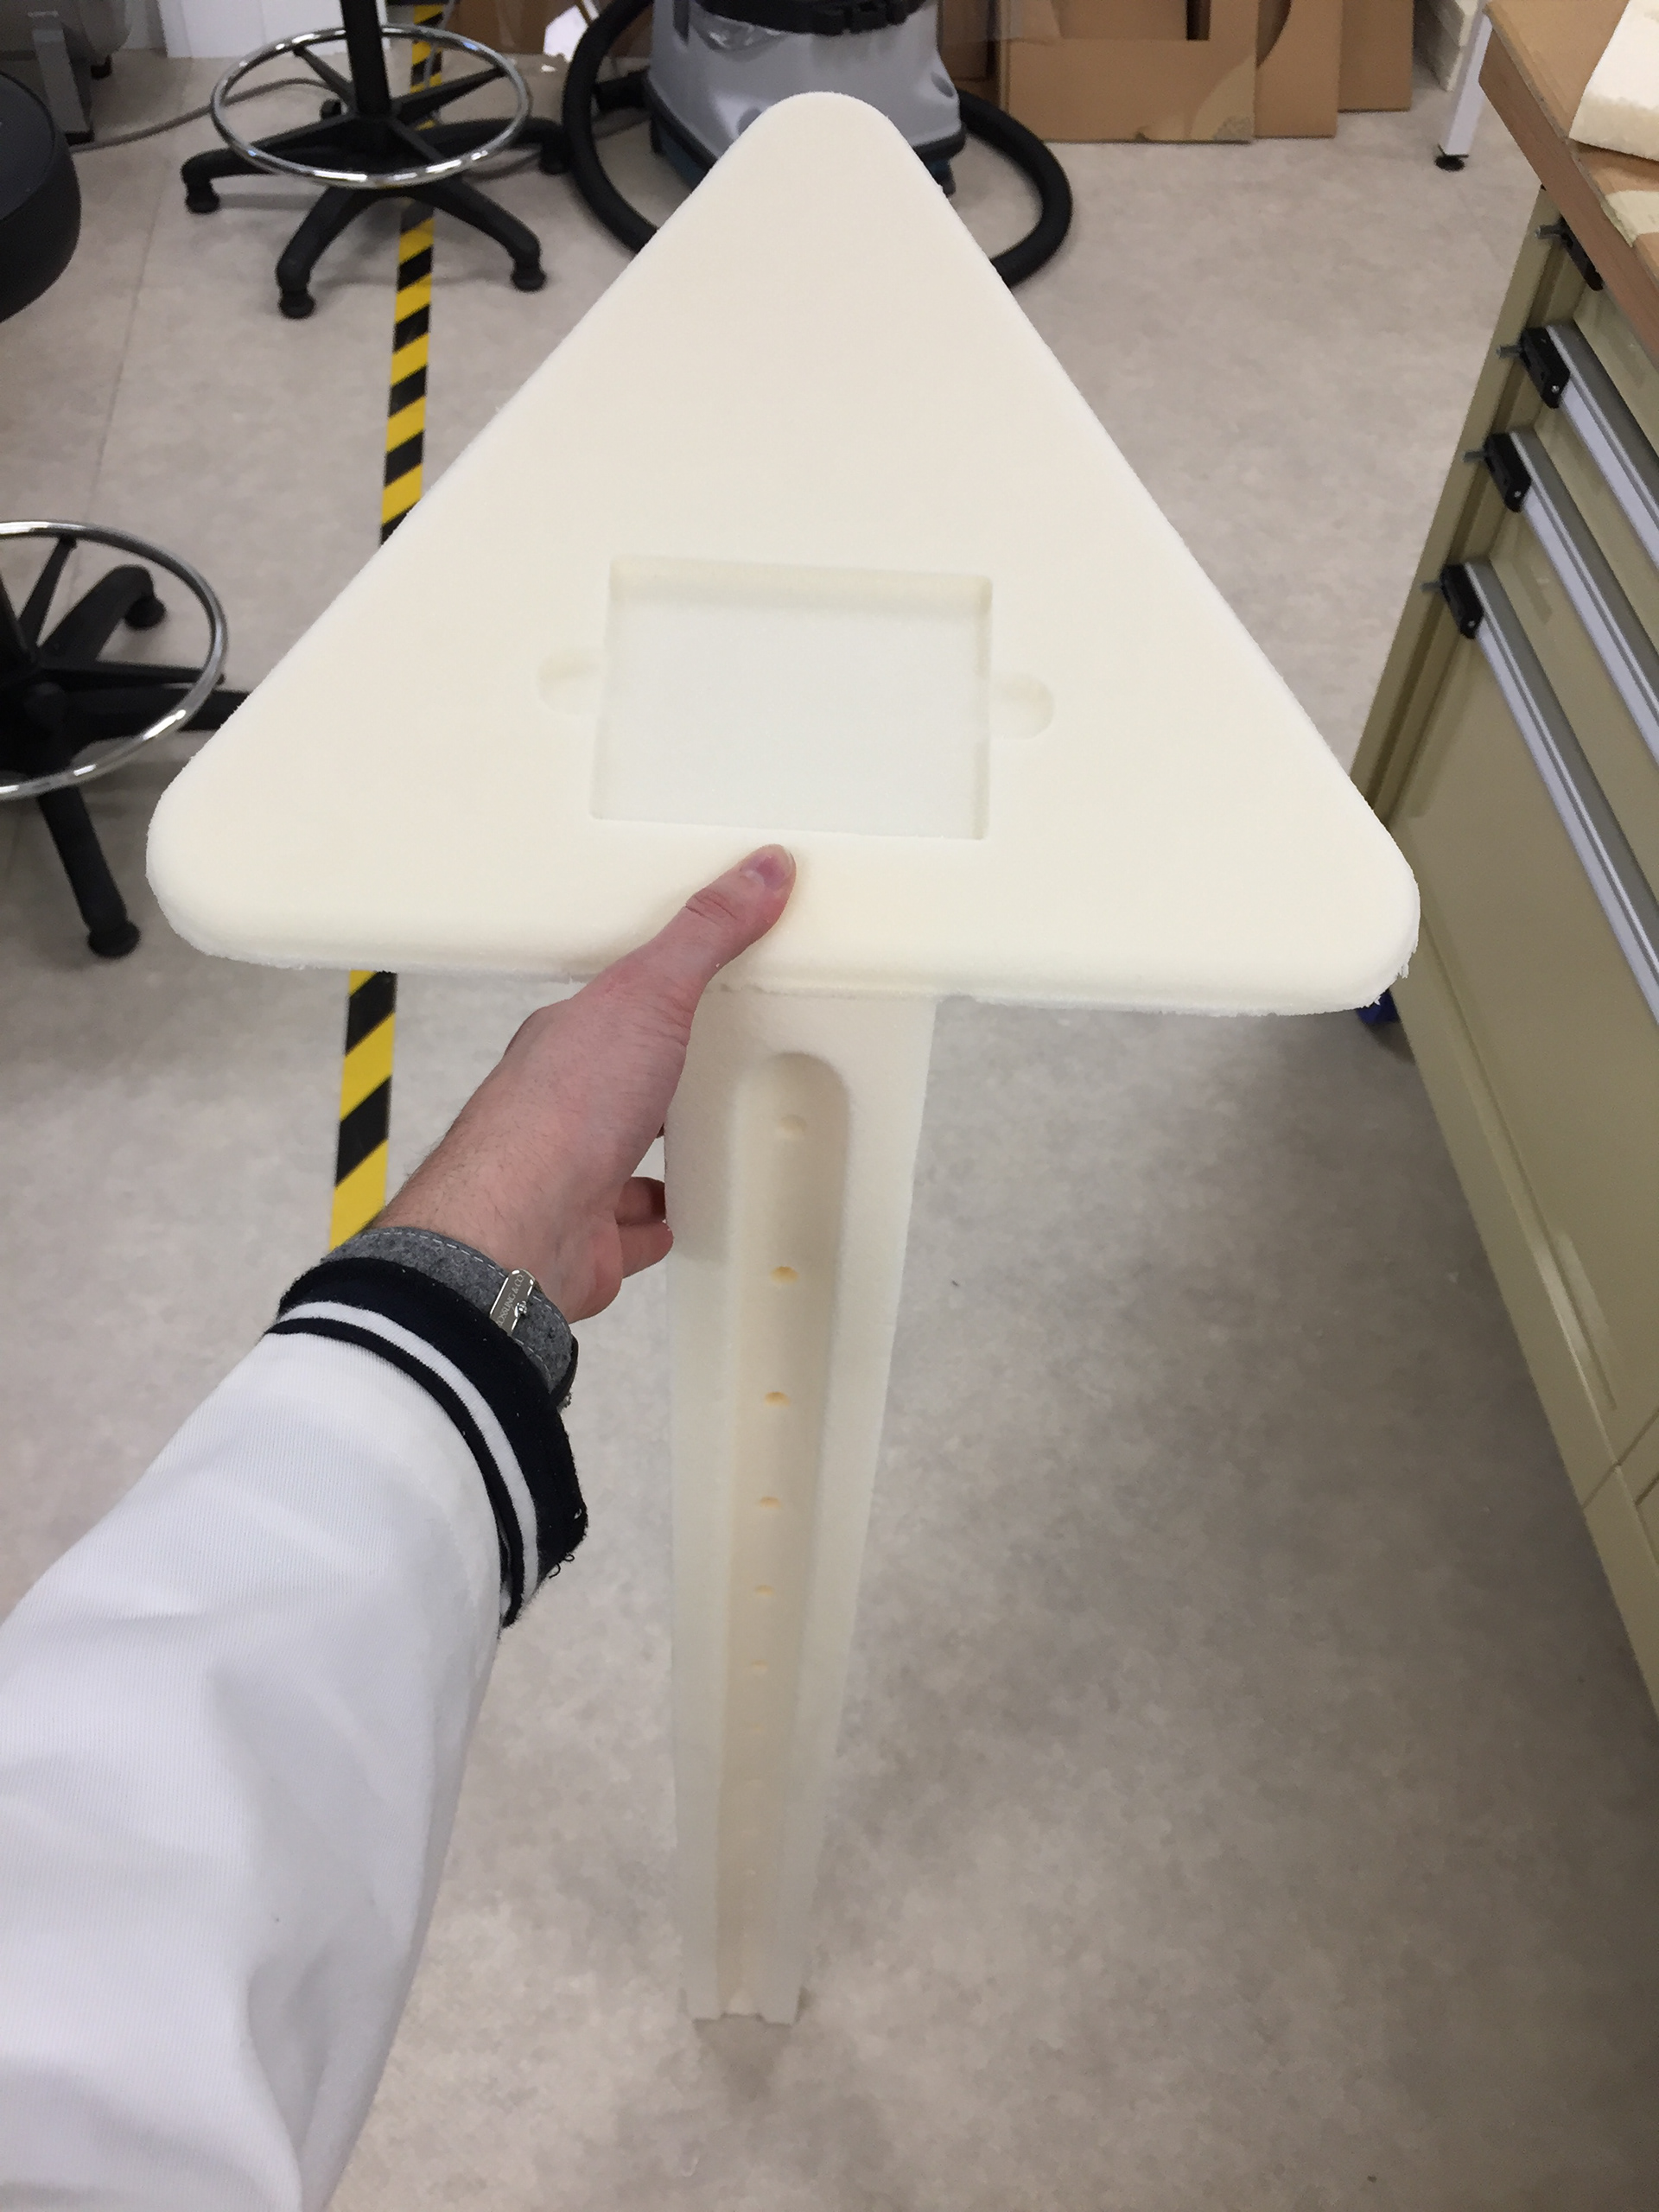
Foam model prototypes were created using hot wire cutters and hand tools such as a dremel, while finer details and smooth finishes were achieved using sand paper.
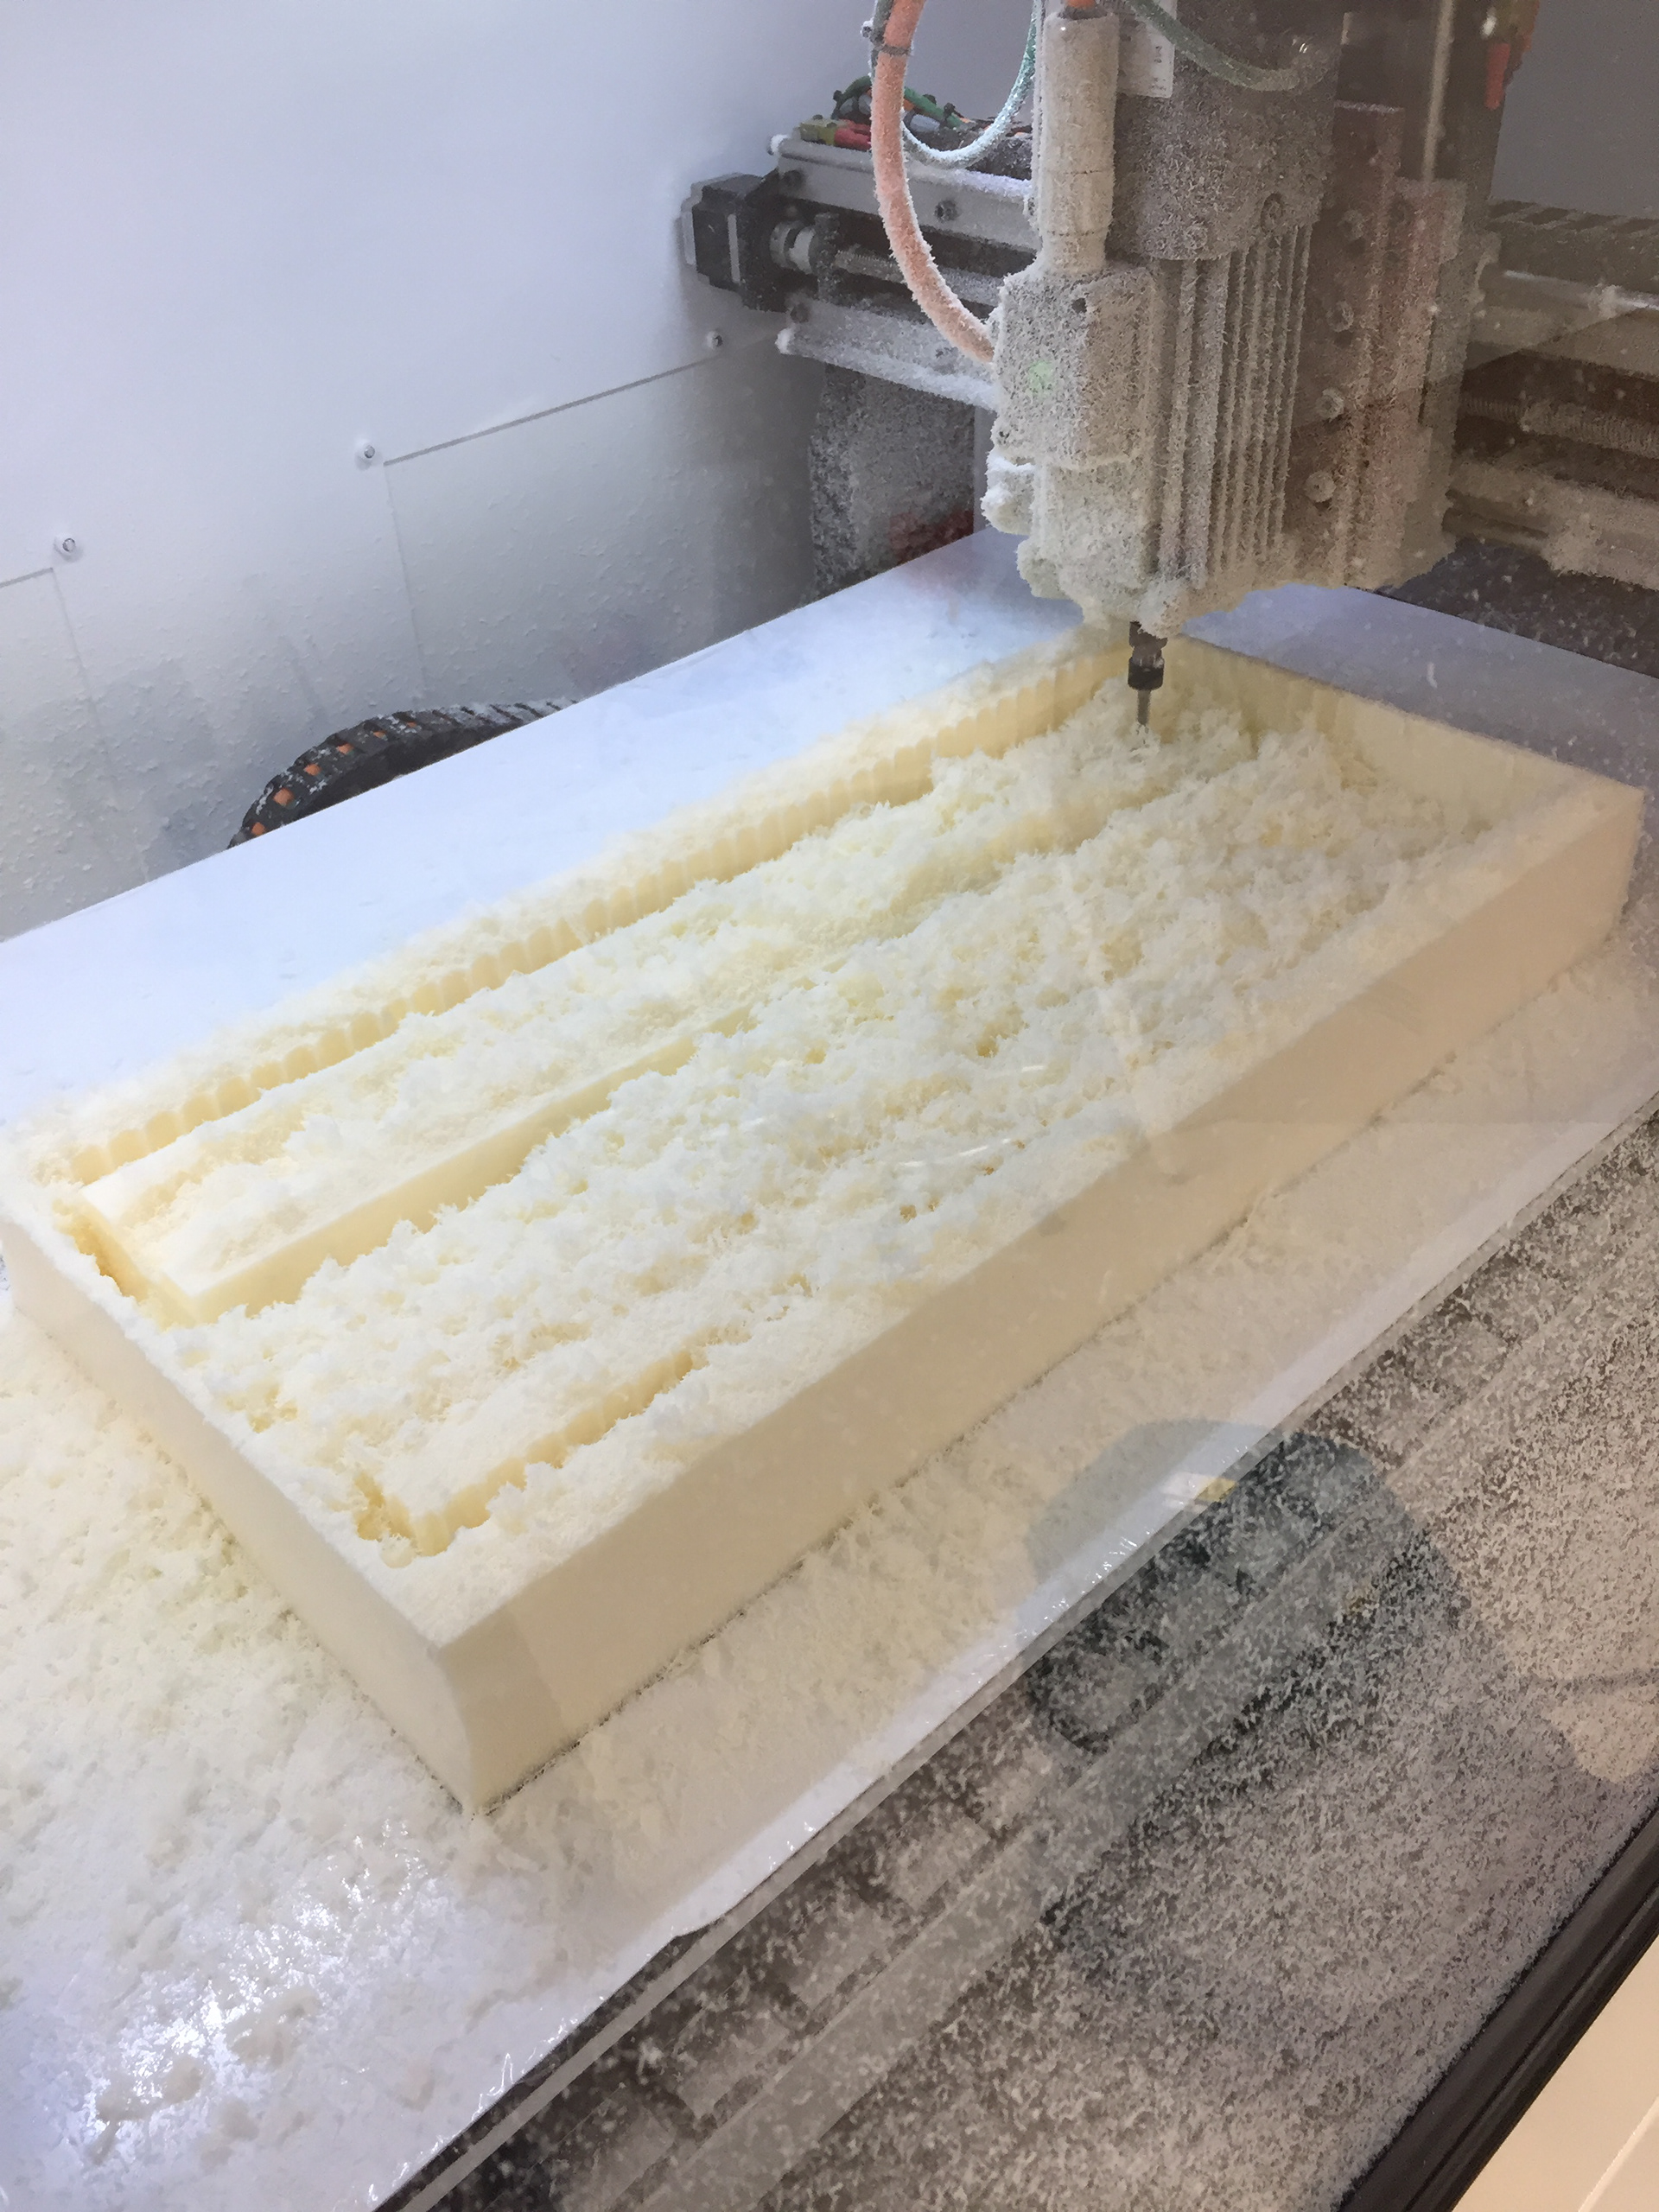
To create a first-off prototype of an earlier revision, sections of the body were cut on the CNC and glued together.
For the final design, the CNC was used to create a negative mould to use for casting.
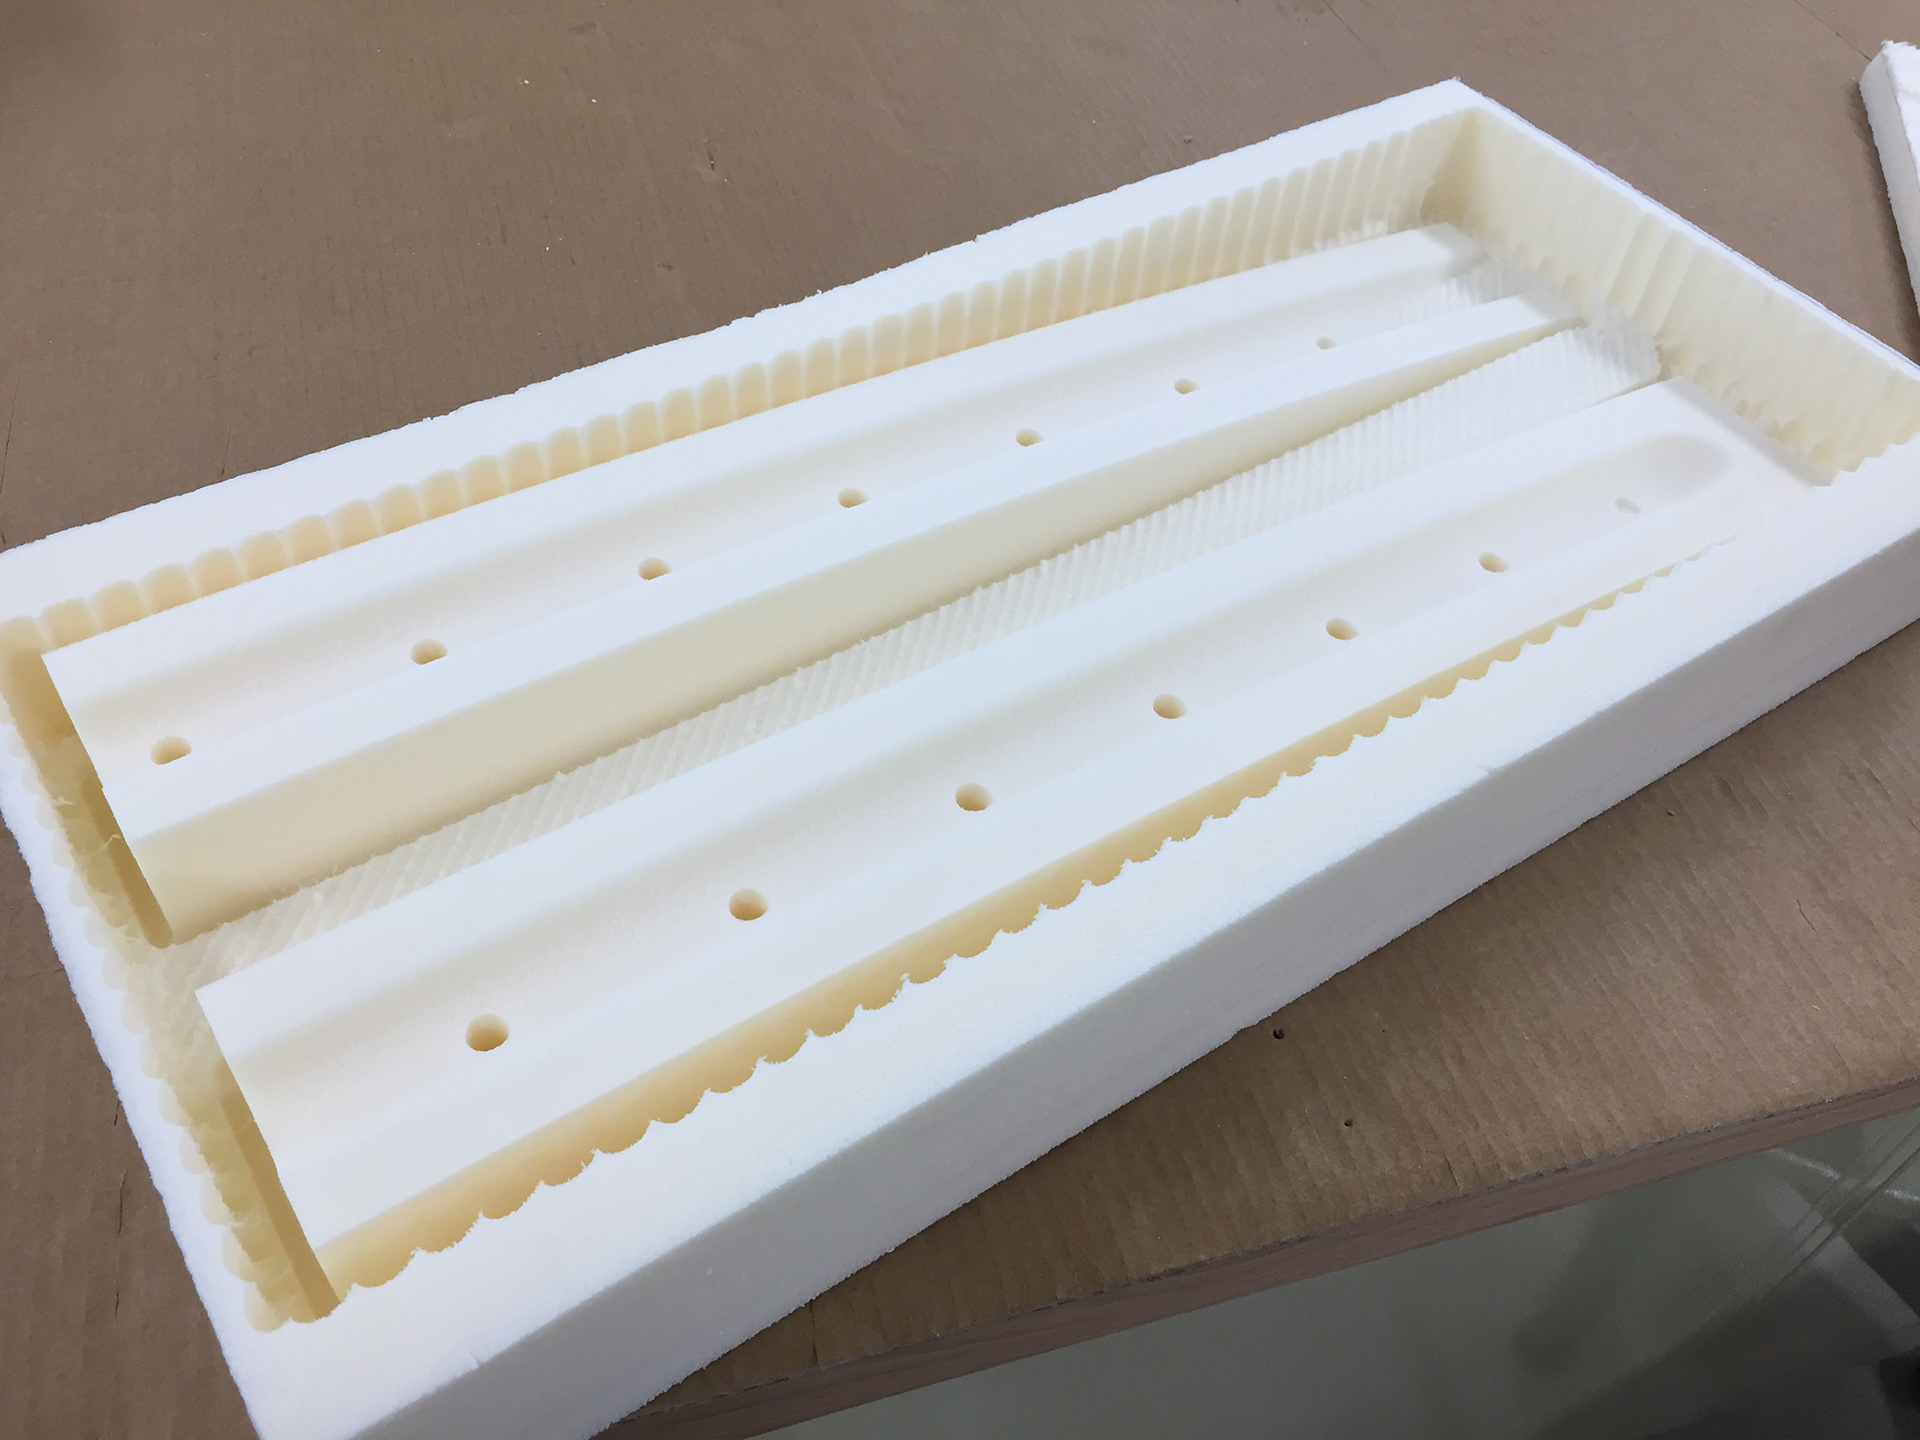
To create a first-off prototype of an earlier revision, sections of the body were cut on the CNC and glued together.
For the final design, the CNC was used to create a negative mould to use for casting.
CASTING
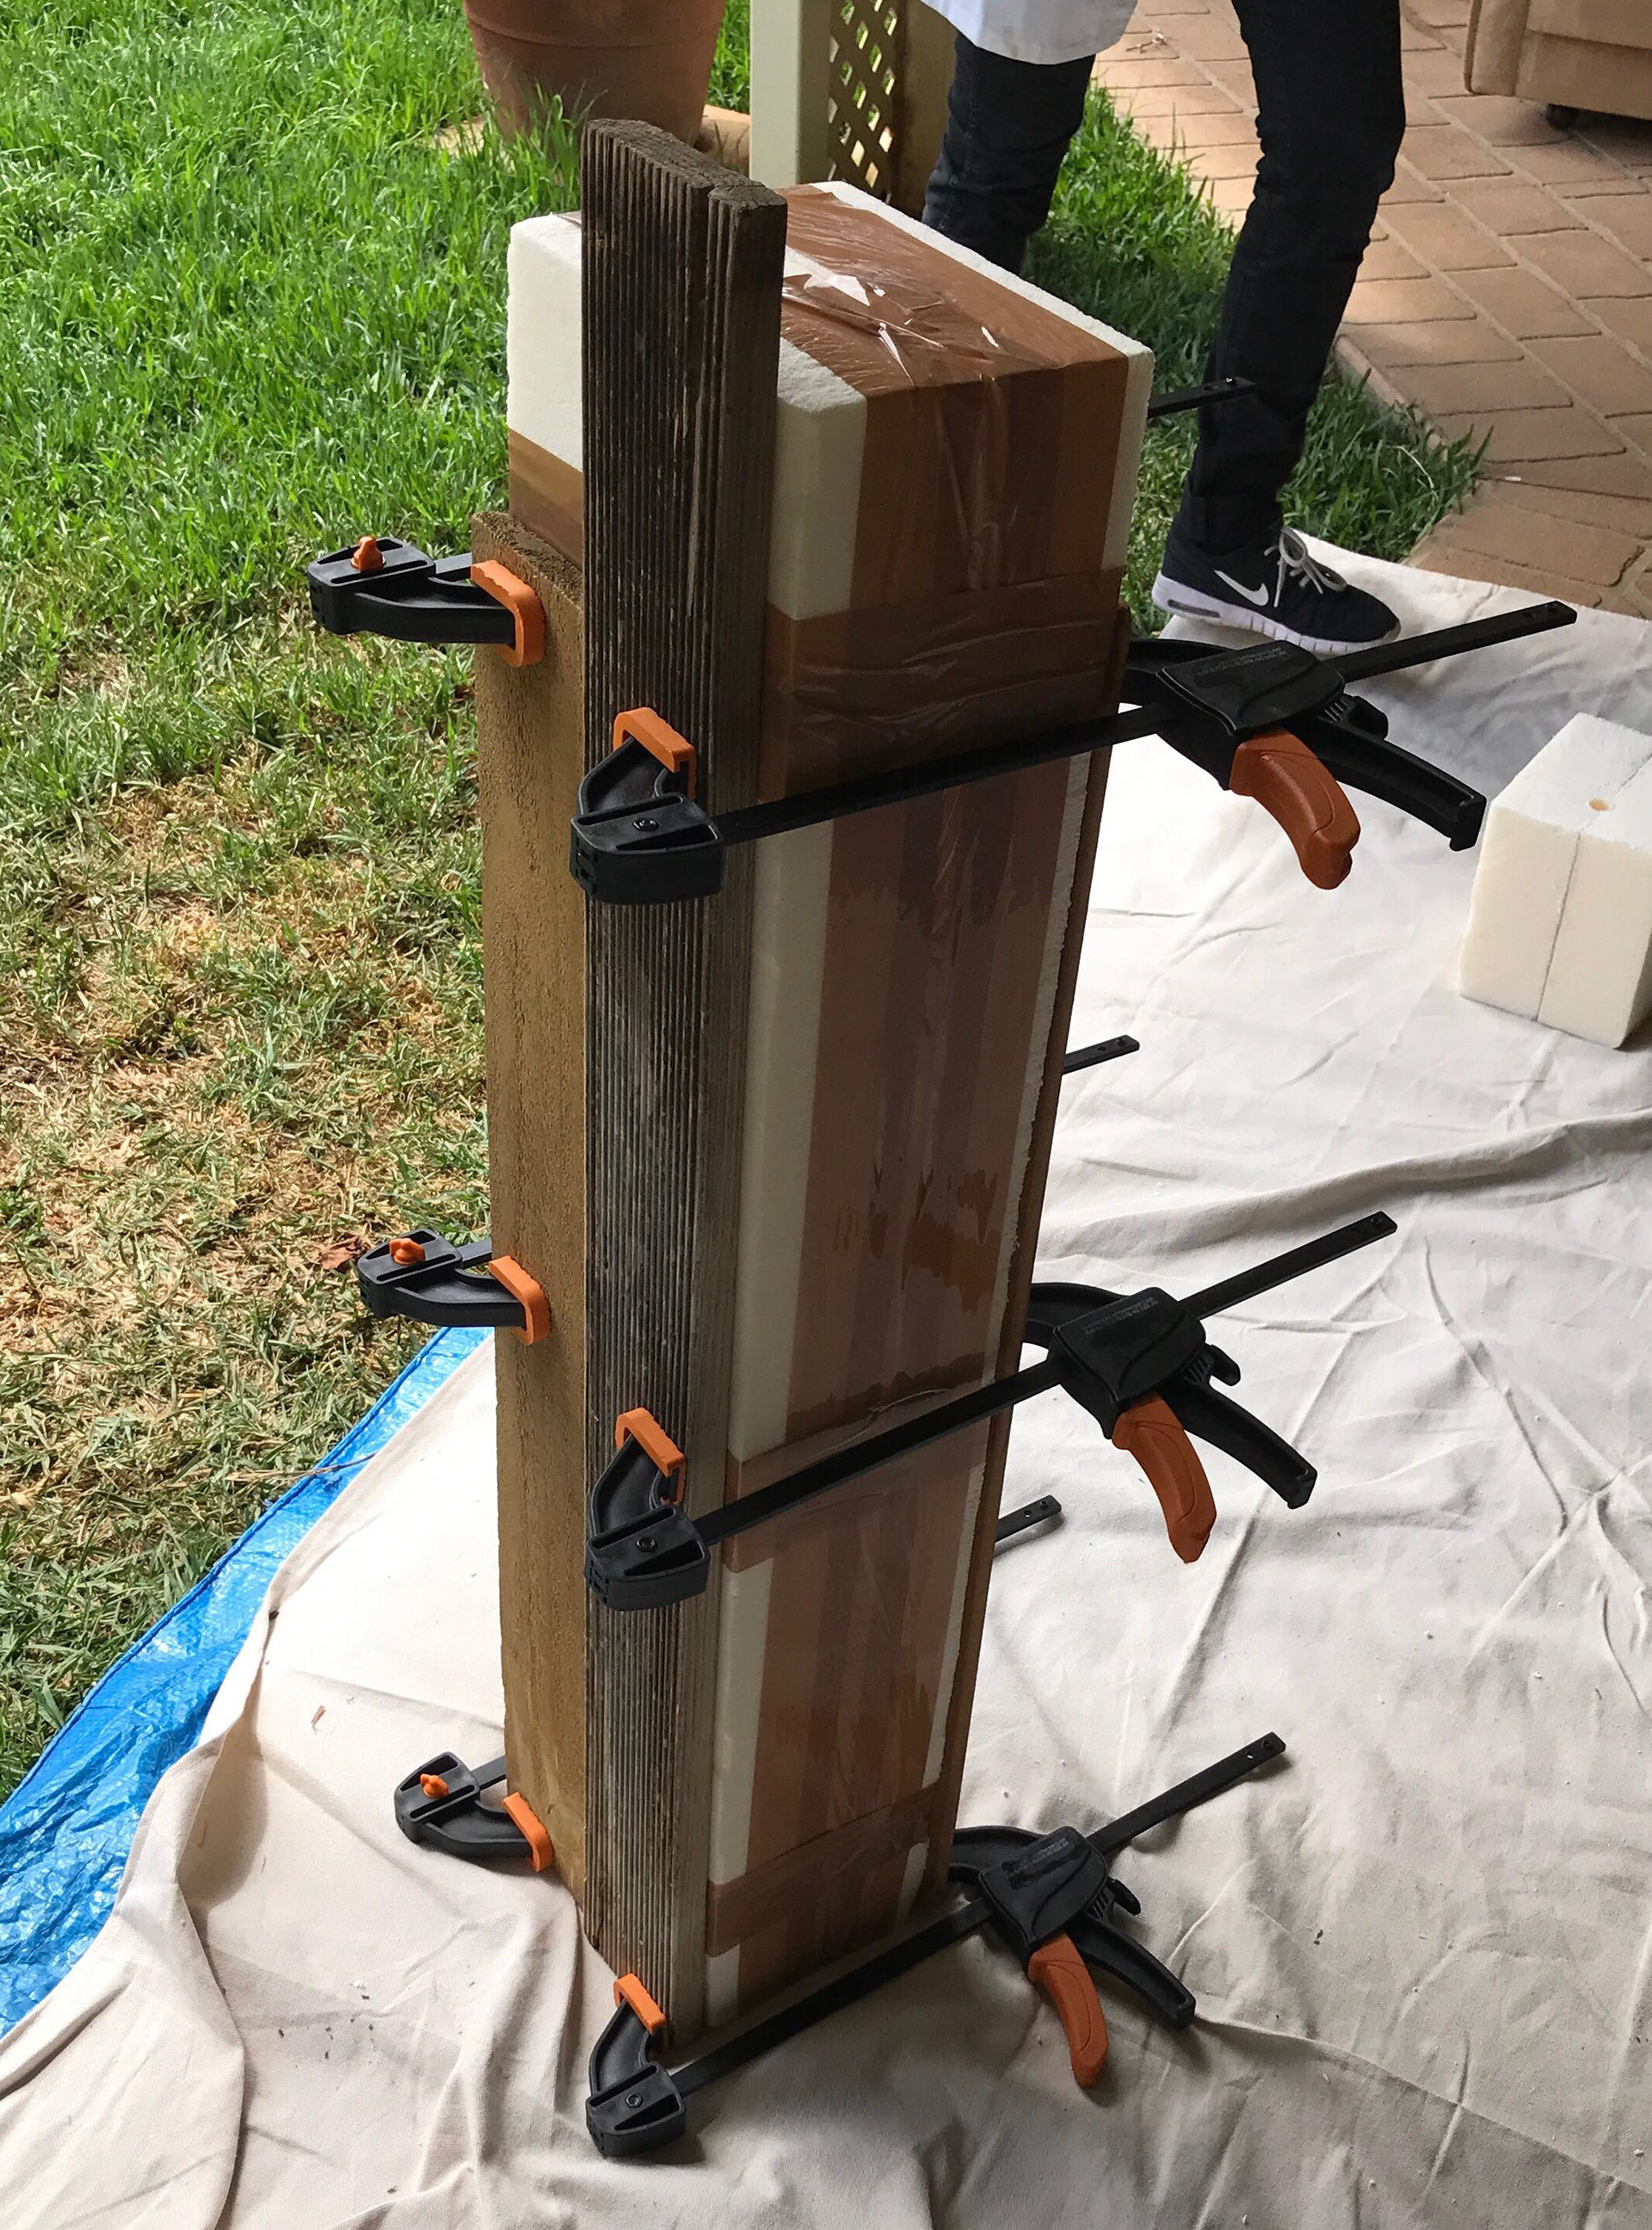
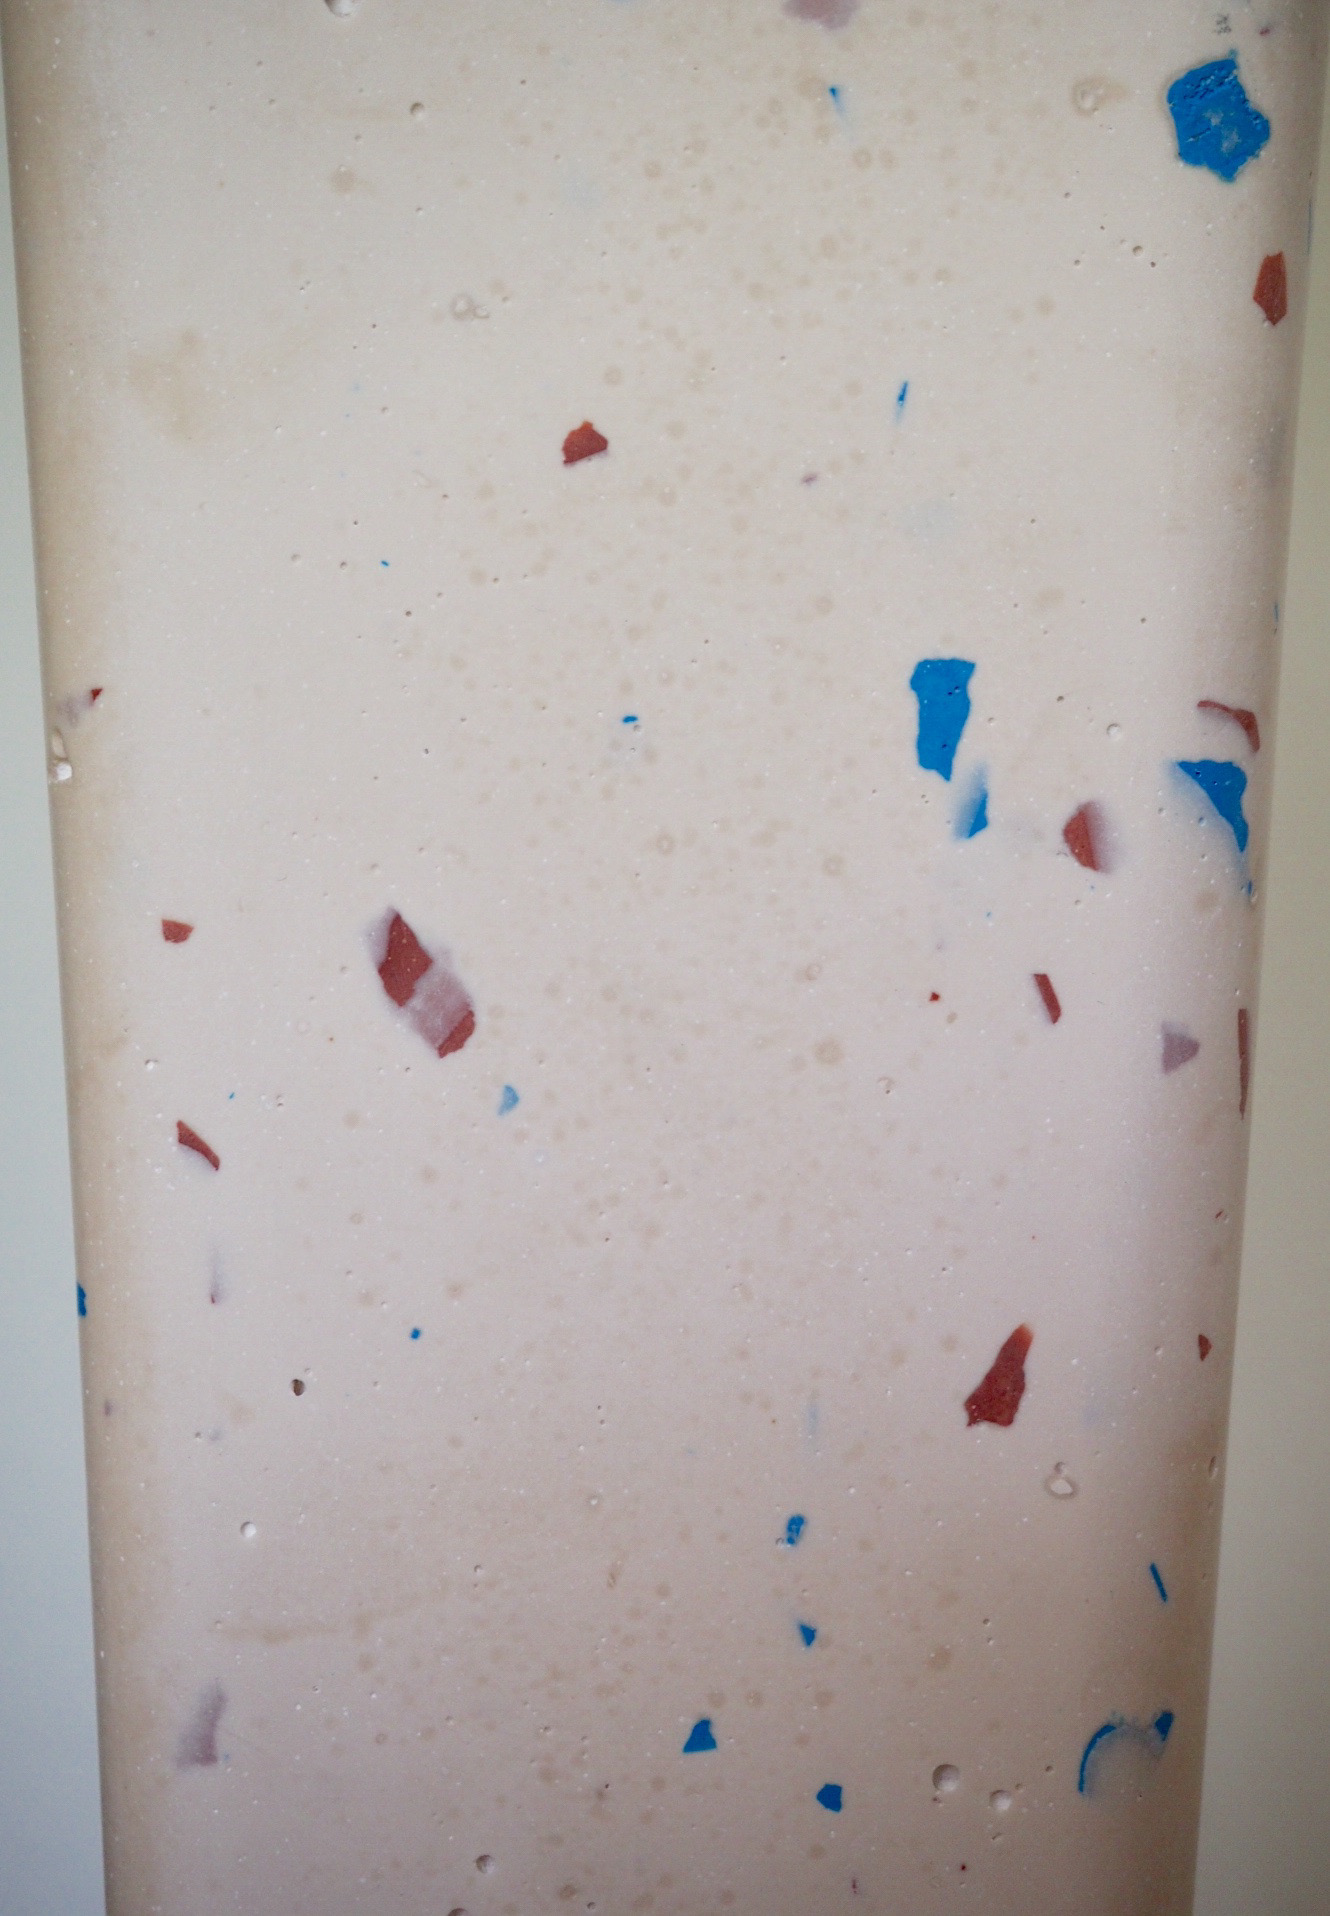
Using a negative foam mould and a material called Jesmonite, a final model was cast. Initial attempts resulted in leakage from the mould, which led to a re-design of the 2 part mould using a lip and groove to create a seal. Manufacturer instructions for sealing were followed by coating the foam mould with chip fat, which also acts as a release agent. After preparing the mould, it was assembled and clamped together ready for pouring.
Images above (middle) show the material after it was removed from the mould (first), which would then be sanded...and sanded some more to reveal the creamy white finish with coloured pieces of fleck breaking through.
Waterjet Cutting
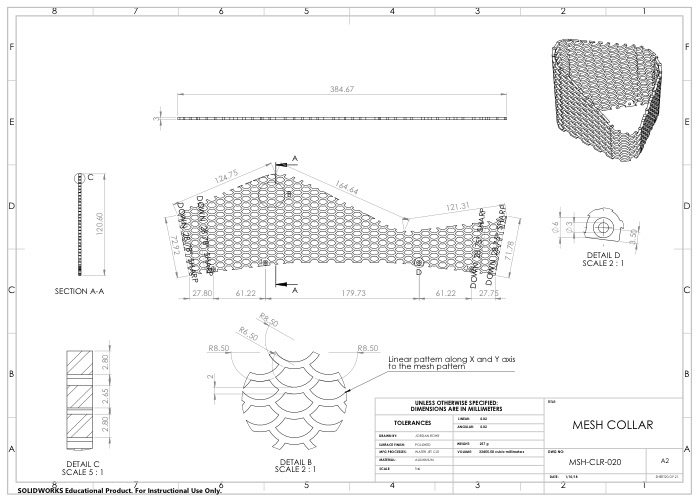
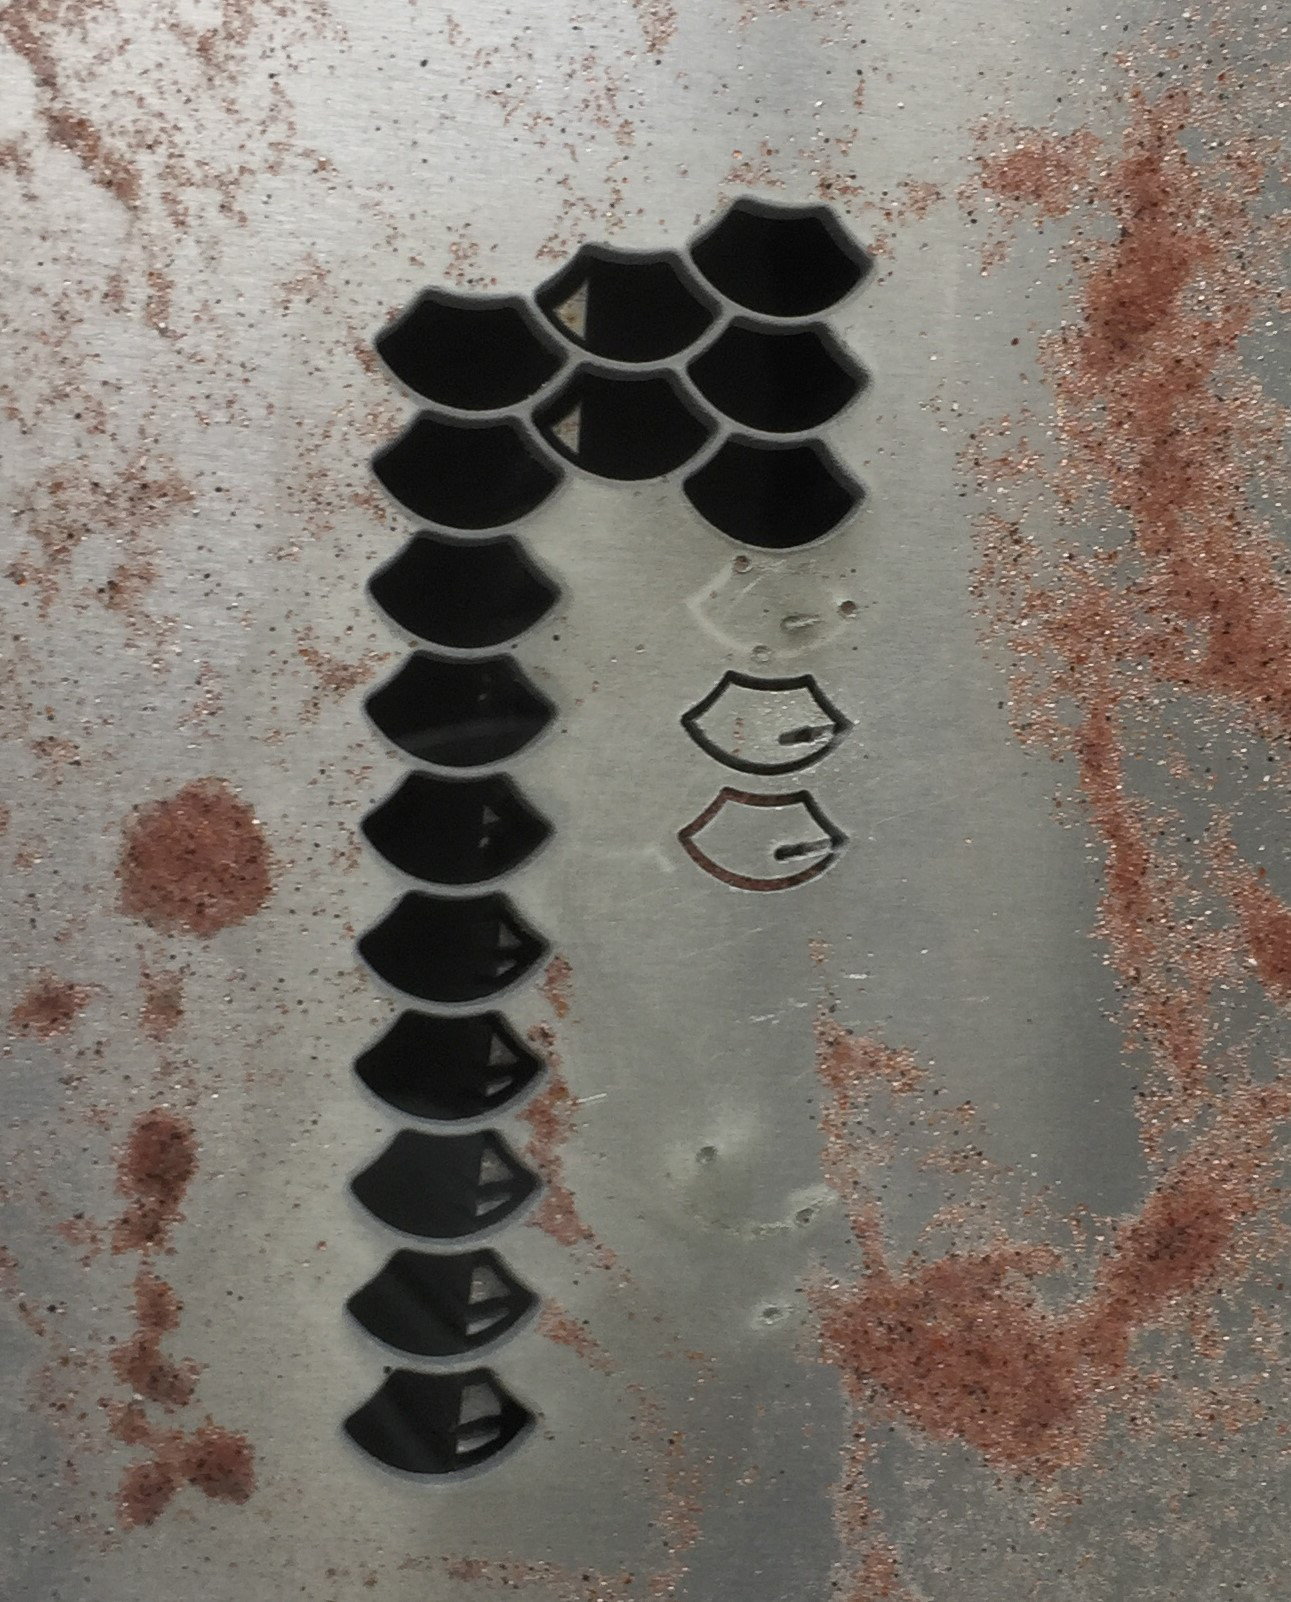
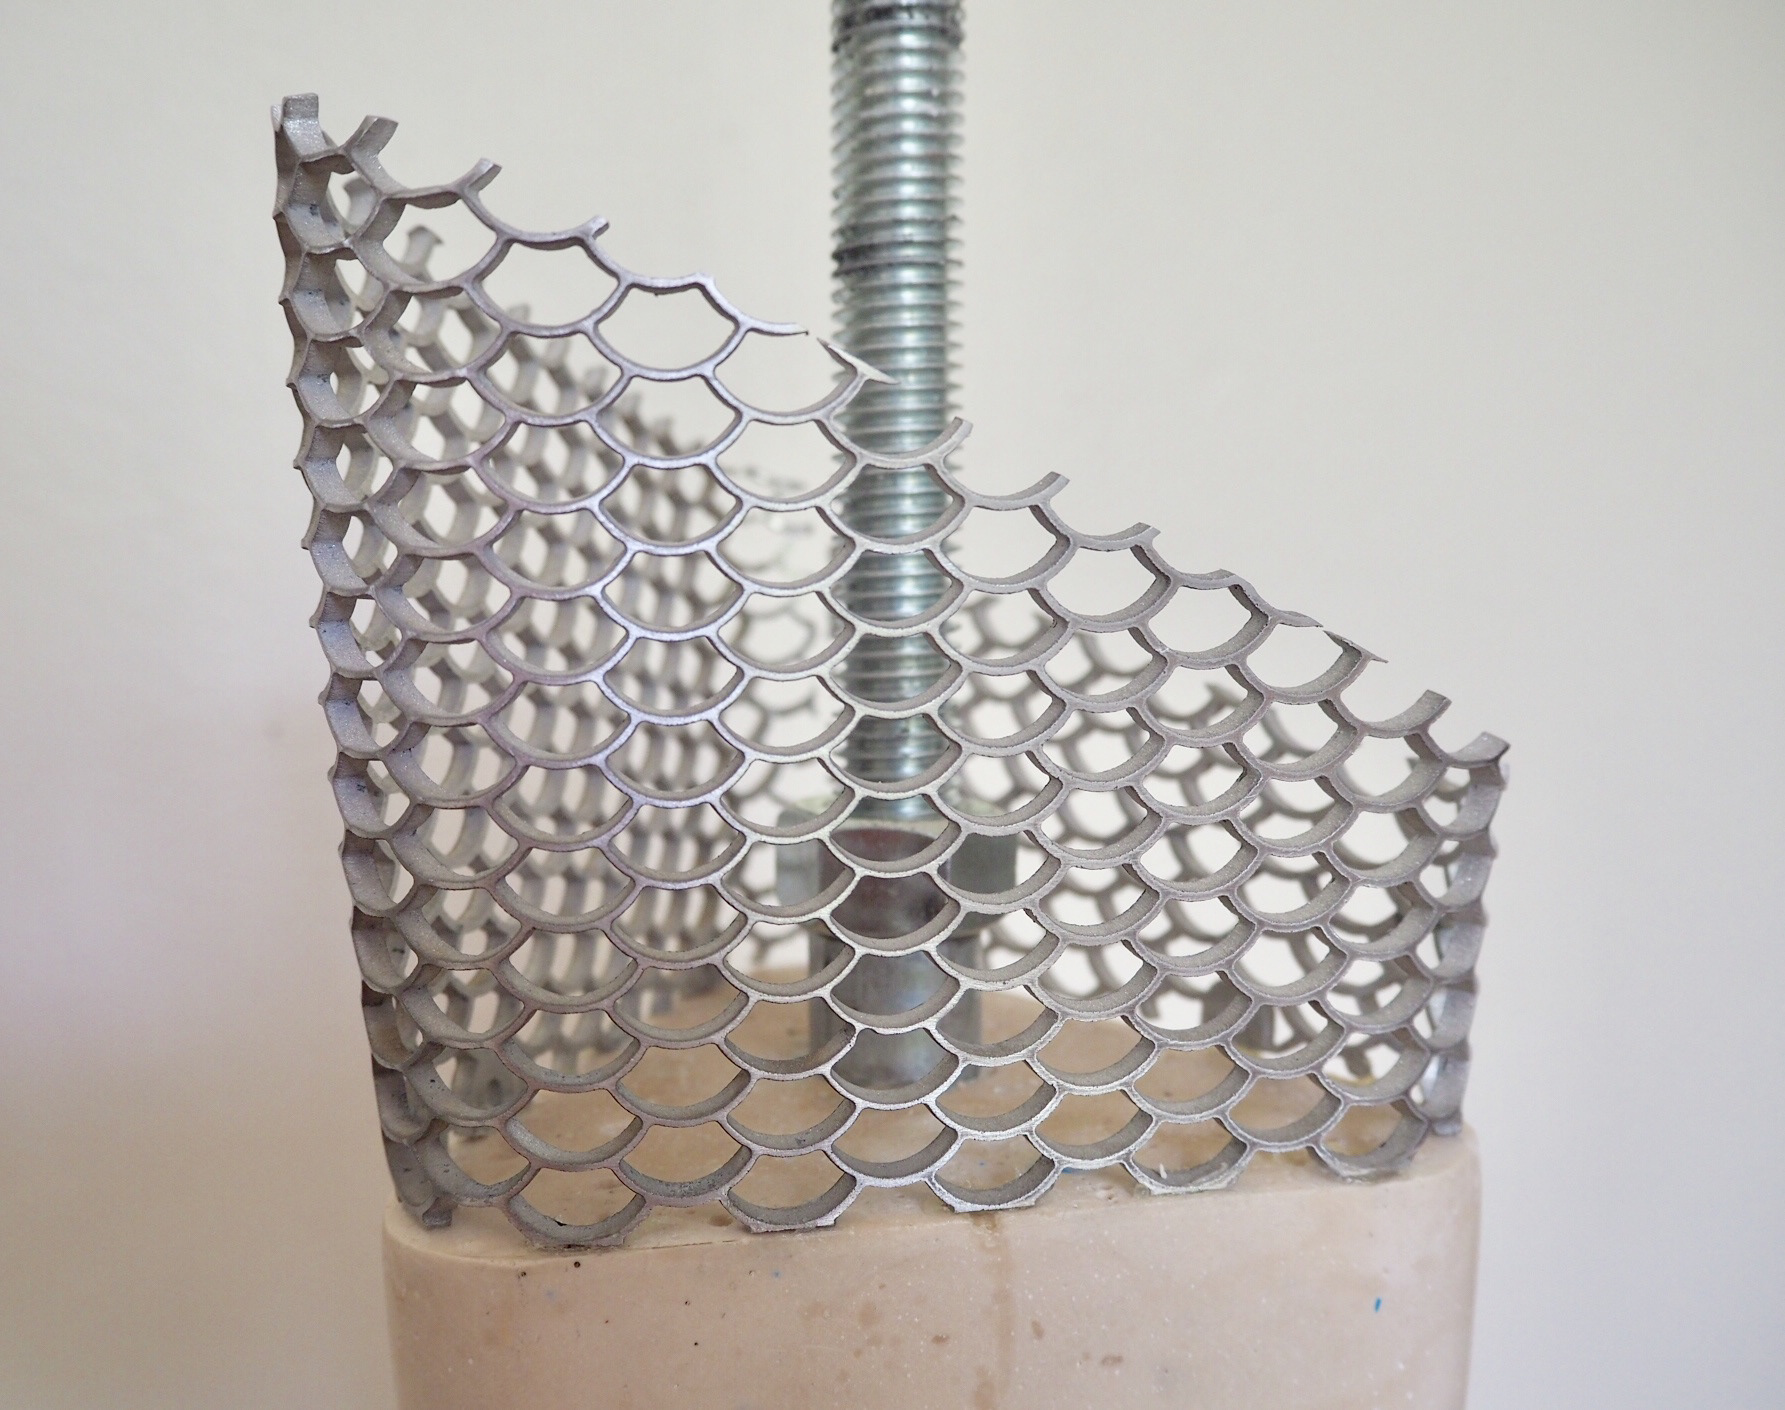
In collaboration with the Jesmonite cast parts, the final honours model used waterjet cut 3mm aluminium. The hummingbird feather-pattern inspired mesh and drawn in Solidworks using sheet metal features and exported as a DXF file, ready for cutting. The middle picture above shows the initial stages of cutting, while the image to the right is the final, hand-bent piece.